Making of… : Part 1

The Hollow City Chronicles exhibition has opened and the web site is officially launched. The sets and other forensic evidence will be showing at Midland Polytechnic until March 4, 2011.
I thought I’d take my short film “The Bystander Effect” apart and show how it was made. It’s all low budget (no budget!), learn-as-you-go stuff. I make no claims to be an expert, just curious and crazy.

The opening scene shows the city from above.

Animating from above

The city isn’t real, of course, it’s a sculpture and it was too big to just lean over the ladder and snap the pic. The lamps are ordinary desk lamps on stands (hope no one in the house wants to read…). The green curtains weren’t needed for this shot – they were there from other filming – we’ll get to that.

Animation set from above

The camera used for the film is a Canon 450D which comes with software that allows it to be controlled from a PC (including seeing what could be seen through the viewfinder). It made it possible to clamp the camera to a roof beam above the set and still be able to use it! Just add an extra long USB cable… It’s not a dedicated “animation camera” (is there such a thing?) it’s the one the family has – four of us share it (unless one of us is hogging it to make a film… in which case it’s probably bolted to the ceiling!)

Animating with the camera clamped to the roof beam

Tomorrow I’ll introduce the puppet and show how she got into the picture.


Art Forensics

Art Forensic skulls with added clay

The past two days have been gainfully spent sticking clay on a skull. The workshop, run by Dr Susan Hayes at the University of WA involved building up the muscle, fat and skin to create an anatomical facial reconstruction. Fascinating and fun. And, for me, a great way to reinforce a course of self-guided study of anatomy – covered in previous posts – which has included books, video and life drawing but this element has been by far the most enjoyable.

Art Forensic workshop

Expression of interested for future workshops to shayes@amhb.uwa.edu.au


Old stuff

My recent post getting all nostalgic about vintage Tetris reminded me that I was going to wax lyrical in a wistful response to James Gurney, of Dinotopia fame, over his coining the phrase “dead-tech”. You’re not following his blog? You should. James has begun a series of articles on old graphic arts equipment and the first thing he hauled out to show the young ‘uns was the waxer. Ah… it was enough to send me hunting through my own cupboards.

Graphic waxer

Pictured, is what was my trusty forerunner to repositional spray adhesive, which was in turn the forerunner to Ventura Publisher for the bookish (remember that?) or Quark Xpress for the hip.

Said implement, was the means to making stuff stick temporarily. After rolling the reverse of a bromide to the sound of… dunno how to explain it… it would be pasted down with a good rub using the heel of the palm. Not in the right spot? It would be peeled up to be moved with the mere flick of a blade at the corner. The bit of bromide would then be lifted with the blade (so as not to touch the wax with ones fingers) and put lovingly in the new position. Or should this be the umpteenth round of changes: slammed down in disgust.

Oh, yes, the scent of molten wax wafting across a light-table…

Have a good laugh,
Amanda
(wondering if there’s a use for it in the studio…)

Toner on copper

Puff the Magic Dragon

Puff the Magic Dragon

I just finished re-making Puff the Magic Dragon – not as a diptych this time – but a triptych in one frame. The experience of having the duo hung on opposite walls in an exhibition p’d me off so bad that I went back to Studio A and started over. After some thought, I made a new version that would make sure it couldn’t happen again. Well, not this side of having someone take to the work with a saw. Could happen…

It actually works out well because the Myths, Stories, Legends exhibition it’s headed for (opens this week) calls for up to 150 words to explain the thoughts behind the work. Puff is (in part) my response to:

Little Jackie Paper loved that rascal Puff,
And brought him strings and sealing wax and other fancy stuff.

Together they would travel on a boat with billowed sail,
Jackie kept a lookout perched on Puff’s gigantic tail.

A dragon lives forever but not so little boys,
Painted wings and giant rings make way for other toys.

Excerpts from “Puff, the Magic Dragon” (1959) a poem by Leonard Lipton

This new work, of the same name as the old one – oh, yes I can – is *giclée on canvas again but this time mounted on board rather than stretched. I made the frame too because I wanted to put the title on the work as is usual with printmaking. The style of the label, however, is more like that of works of old – copper set into the wood.

Toner on copper

Toner on copper

There were a couple of ways I could get the wording onto the copper – as printmakers do by etching with acid but chose instead to use ferric chloride as they do for making printed circuit boards. Why? Because I had the stuff laying around. (It’s a long story.)

The first step, however, was to get a mask or a resist onto the copper. When that part was done I liked it so much I left it be and didn’t bother etching it and that’s what you can see in the photo – toner on copper. The method used to transfer the resist, I’m thinking, might be of use to someone else out there in art land… because it too uses stuff you probably have lying around. (Disclaimer: I know this is good for ferric chloride, you can Google how, but don’t know if it works with acid)

Materials

Gloss inkjet photo paper Laser printer or photocopier An iron

Method

  • Print the image onto the inkjet paper with the laser printer – yes you did read that right.
  • Put the image with the image side face down onto the copper carefully aligned and well stuck down with masking tape so it can’t shift.
  • Heat the iron on the hottest setting – no steam please! Take care at all times from here on because the copper will be HOT.
  • Put the paper / copper / masking tape sandwich with the backside (blank side) of the paper facing you onto a block of wood or other heat proof surface and iron the back very, very thoroughly. And then iron it some more. And then iron it some more. At some point after ironing it very thoroughly you can peel up an edge of the masking tape and take a peek to see if the image has transferred to suit your taste (I was looking for scratched and less than perfect.)
  • Peel off the masking tape and the paper. It will leave a layer of paper on the copper. Don’t pick at it!
  • Drop the copper into a dish of water and leave it for a bit (10 minutes? 20 minutes? depends on the paper) until the paper goes really soft. You can pull it out every now and again and give it a gentle rub. It’ll eventually come off easily.
  • Voilà! Or maybe not. If you don’t like it have another go – the toner will clean off easily with a plastic scratchy. (If you want to make minor repairs you can use a Dalo pen (about $6 from Dick Smith) to touch up the resist.) And if it’s all too hard you could just get a giclée printed onto aluminium which looks very nice and wouldn’t take all weekend experimenting…

Have fun,
Amanda

PS I’m going to give Type Tamer my giclée supplier a plug. (They’re in Malaga. That’s Malaga in the northern suburbs of Perth, Western Australia, not the one in Spain…) I will however declare that I do have an interest in the company but also state that the work stands for itself.

Pixel Pixie

Munsell chips

Tones, or values, are more important in representational painting than colour. A strong statement? Think about it – a black & white photo tells you everything you need to know to identify an object, colour just makes it prettier…

Munsell chips
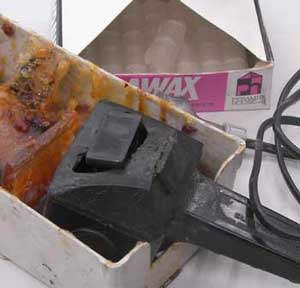
Estimating values is for many the tough part of learning to paint. Squinting helps but even then: what’s what? A value chart gets around that by giving something to measure against. I followed Paul Foxton’s lead and made a set of Munsell “chips” a while back (the bits of wood in the photo) to do exactly that. Using them, by the way, did not turn out to be a crutch for life, as some folks reckon, it was only a matter of months before I was mixing the greys without looking and for the most part even thinking about it. They’re in my head (somewhere…).

Now, that’s all very fine when painting from life in the studio or (gasp!) a photo or other reference. Yeah, I do use photos when I need them. For one I paint ’til late (* think 2am…) and there ain’t much out there to see if one is painting landscape. Or in my recent clouds series: not many to be seen in Chittering over the past months. OK, so there’s the occasional fluffy white against the endless blue but not a one of the moody storms I had in mind. Besides, getting on into the series, I needed inspiration cos my plan calls for a hundred studies – I got to 67 before a more urgent project elbowed them aside – I’ll be back. Anyway, on topic, photos rock sometimes and dovetail very nicely with a value chart or chip while learning to see.

However (there is a point to all this), when I switched from using prints to a screen to display my reference (lots of reasons: among them zooming in on detail and way better depth of colour) there was a problem. Holding the chips up to compare to the screen didn’t work because the screen is bright and light and no matter what angle I held the chip to it I couldn’t get a match as I could with the hardcopy.

That’s where a tiny freeware utility called Pixel Pixie came in. What does it do? Simply a small box (on my screen about 4cm wide) floating over the top of any other software that’s running it displays all kinds of colour info – among them HSV. It does other stuff too but that’s what we want right here. The V in HSV stands for value… the value of the pixel at the end of the pointer. Can you see where this is going?

Pixel Pixie screen capture

Pixel Pixie

Read the values off the image, match it to a Munsell chip (or other value chart as you wish) and from there to your paint. Maybe in 10% divisions where, say, everything in the twenties is a value two, or the 50’s a value five etc. This works nicely with Munsell which goes zero for black through to ten for white. Some other value charts have it back to front – no problem – a nice fat red crayon can fix that…

The end result won’t be perfect, of course, because that’s where the art rears it’s head again. Beyond the blocking in of a painting it’s time to “go with the force” (Peter Dailey said that in class once – it still has me chuckling) and adjust to your eye and temperament. It can also be desirable to change values on the fly – raising or lowering the temperature of the painting by mapping to a compressed range. For example, decide that it’s a really moody sky and move everything down to a smaller range of dark colours.

Anyway, have a go, because anything that takes the frustration down a peg or two is worth doing and don’t worry about getting dependent on any tools (photos, chips or software) ‘cos at some point the eye does kick in, especially if you have a guess first, then Pixel Pixie or compare a chip to check it.

Have fun.
Amanda

(* Painting day and night (really should get a life…) offers another problem: colour shifts under different light. I solved the problem with two Daylight lamps: one on the easel and another over the palette table. Works OK. A perfect south facing window – Australia remember – and shorter working hours would be better but neither of those is happening any time soon.)

On photographing art again…

Scratch that last post on setting up a cheap and easy backdrop for photographing art. There’s a better way. Actually there’s a proper way. As luck would have it Paul Leathers was running a workshop on exactly that topic (and what goes on in front of it) yesterday at SODA in Fremantle. Why am I telling you now? Because it was good, really good, and it may just be worth giving SODA a call. Word was, that since ten people went on the waiting list, in case anyone cancelled on one of the 15 places (not very likely!), there’s a chance they’ll run another before Paul returns to Canada.

The course description went “Paul Leathers has lectured on digital photo-documentation internationally and has documented artworks for institutional collections and individual makers. His images have been published in numerous books and magazines. Photo-documentation is the final step in finishing your artwork! This hands-on workshop will introduce the principles and practices of digitally photo-documenting both 2D and 3D artworks. The emphasis will be on keeping the process simple and inexpensive…”

Worth every minute and the 2 hours traveling each way… and guess which twit left her camera sitting on the kitchen table? Nevertheless, I came back with a dozen pages of notes and confidence sufficient to polish up that undocumented stuff known to be lurking under the studio dust.

Contact: Fleur Schell on noonan@preciseit.com.au or 9433 4836

Also, Paul has a show coming up at Perth Galleries from the 10 April – 3 May.

Makeshift photo backdrop

A thought offered, in all humility, from one who knows not much (if anything) most days. And some days even less…

Found myself in the studio looking for an urgent means to block out the background for a photo of a sculpture. (Yeah – it’s a mess in there – not a blank wall to be had anywhere.) The usual thing the pros have is a tall frame and fabric. Such things can be had on E-Bay but they’re pricey even there. Couldn’t find anything even remotely like that here that might be pressed into service – besides all the bed sheets on hand have patterns on them. Ninja Turtles anyone? I didn’t think so…

Then the desperate eye rested on a stack of canvases. Yes! Add a handful of clamps… Pictures say the rest. Note that the structure is clamped to the table top as well as the canvases to each other. And if they get a bit grubby with storage and use? Well, I reckon they might just take a coat of paint.

Photo backdrop

Photo backdrop

Sculpture

Form I (2007) Wood and stainless steel, 600mm x 900mm – 600mm

Keeping acrylics wet

Keeping acrylics wet

Wet acrylics

My preferred process (subject to change without notice) is to work up studies in acrylics and finals in oils. Acrylics dry fast, which is an advantage for tweaking colour or value by the “paint over ’em until it sings” method. Matching those choices for the oils is pretty straight forward, while the acrylics are not because they have that nasty little shift when they dry. Yeah, I care about consistent colour on my studies… once I’ve made up my mind that is.

One solution to keeping acrylics matchable is to keep the piles of paint wet. The trouble with this theory is that they dry fast (doh!) – especially when the thermometer is topping 40ºC (104ºF)…

So, how? I spritz the blobs of paint with water (or water mixed with a little retarder if I’m feeling flash but I don’t think it makes much difference) then cover it with cling wrap. I do this in such a way that the edge can be lifted just enough to slide the brush in. An occasional extra squirt helps, then a good freshen up with a little more water and new cling wrap at the end of the day. Perfect for a couple of weeks if you must… Toward the end of that time it may be getting a bit cruddy to use but it’s fine for getting a perfect match. I generally just keep it going until the pile runs low and then match it with a fresh lot. And on and on. Playing tag with paint can keep a colour going for months if I need to.

Brights

Firstly, I should point out that I’m not always down at the art shop looking for new things. I’m actually a bit of a stick in the mud – preferring to use what I have and hope to get better with more practice. Sometimes I get pushed… and the dominoes effect does the rest. I’ve been comparing notes with Paul over at Learning to See and he said that he prefers to use brushes called “brights”. I thought they sounded interesting but couldn’t think that I’d seen anything like that at the art shop I usually go to. Thought no more of it.

Then I was looking for information on an oil primer that could be cleaned up with water (I’m allergic mineral turpentine – seriously so!). I’d heard that Art Spectrum made one so I was Googling – hoping for a data sheet. One of things I found was a page by them called Oil painting without solvents. Very interesting…

Among other things on the info sheet was a discussion of brushes – mentioning brights and their ability to give “crisper, harder edged brush marks”. Hmmm. About time I thought about these a bit more.

The problem is they’d have to be synthetic too. I don’t use animal products.

So I Googled around a bit and found a brand called Neef – who make a stiff bright synthetic- advertised as “allows for tight control in strokework, smaller sizes can be used for detail or highlight work. Due to the ease of control this brush is ideal for the beginner. The stiff synthetic has the firmest spring”. Beaut. Time to order. Mail order would do – I knew that my art shop wouldn’t have them.

Anyway as a follow up to this I did a bit more Google magic and found that there is a supplier in Perth – an art shop called Murray Gill Fine Art Provisions. I had never heard of them. They’re in Subiaco which is a long way from here. Never mind, we were having a day out maybe this could be the first stop. It turned out to be fun, a great little place with lots of different brands to those I usually see. I’ll definitely be going back.

What did I choose today? A few more Neef brushes – rounds this time. And this little wooden brush support for when you need to put a loaded brush down for a second.

Brushes on a brush rest

Brushes on a brush rest

Amanda

Linocut tools

Linocut tools

Linocutting tools

Since I had them out to play, I thought I’d snap a picture and show my linocutting tool kit – even though there’s not much in it – someone may be interested…

  • two tools: a small v and a gouge out of a set of Japanese wood carving tools. I do have the set but only tend to use these two. I also use them for woodcutting so I’m careful to keep them sharp. Sharp tools are easier to use and safer too.
  • a strop kit to keep the tools sharp, I use this one but any strop would work. Small is fine because the tools are small. Clear instructions came with my kit but there are also good instructions in this thread at the Wet Canvas forum (go down to the third post by Willamette)
  • a small piece of the rubbery stuff that goes under floor mats to stop them slipping – any department store should have it. I “borrowed” mine from under the mat in the hall… It works better for me than a bench hook (shown below) – mine is home made from scraps of MDF and works just fine. I’ve simply come to prefer the bit of anti-slip mat.

Linocut bench hook

Linocutting bench hook

Beyond that that you need good lighting, a comfortable chair and some good music. It can be a long process on the bigger or more intricate blocks – please take care of your back by not hunching over. Remember to take regular breaks to stretch.

That’s it… happy linocutting.
Amanda