Evaporating ink and fountain pens

I thought I was imagining it – an empty pen – I was so sure I had inked it just a few days before. Cleaned it, re-inked it, again it dried out. Rinse and repeat. Several times. Several pens. So, I set up an experiment. Every fountain pen I own: all cleaned, all fully filled, all left in the same drawer for a month.

The bad ones:

  • Hero 86
  • Lamy Safari
  • Noodlers Nib Creaper
  • Noodlers Ahab (two of them)
  • Pilot Kakuno
  • Pilot Prera
  • Zinhao x750 (two of those as well)

The keepers:

  • Platinum Preppy
  • Rotring ArtPen
  • TWSBI Eco

Granted, good or bad, my pens are all from the modest end of the fountain pen spectrum, but it appears that cost has nothing to do with the problem – the two Pilots weren’t that cheap and the humble Preppy is a bargain. (And it’s a available with an almost needle-like 0.2 nib… Just saying.)

The manufacturers and resellers don’t take this issue seriously. It matters, really matters, because good ink is expensive. Telling me I should keep my pen empty unless I want to use it straight away doesn’t cut it. These aren’t collector-pens or vintage pens but modern ones made with modern materials. I expect to be able to have them inked up and ready to go.

That Pilot Kakuno is marketed for kids. A beginners pen. It dries out to a totally empty cartridge within a week. Whatever the reason, it’s going to leave an entire generation, and their parents (and the aunty who bought the kid the pen), thinking fountain pens are unreliable. What were Pilot thinking?

The evaporation isn’t limited to plastic pens: the Zinhao are metal. (Very cheap on eBay, but there are Chinese cheapies that are fantastic. Price does not indicate quality in fountain pens. I bought these intending to replace their nibs with the flexible ones from the Ahabs. Won’t bother now.) That’s useful information because I can hereby quit daydreaming about the metal version of the Pilot Falcon, never mind the lovely soft nib, until it’s proven (by someone else) that they don’t evaporate the ink as fast as plastic Pilots.

I use my pens. Or rather, I used to use them. There are nine which will now be cleaned up and stashed away for winter. Useless. It doesn’t leave me with much for the rest of the year. OK, I heard that. Why would anyone want that many pens? Black, a couple of greys, a green or two and definitely sepia – in both waterproof (to use with watercolour) and water-soluble (think pen & wash). And that’s before thinking about statement-making bold line vs delicately spiderweb fine.

To ease the disappointment I’m getting a Platinum Plaisir in Gunmetal Grey. It’s just a metal Preppy. When it gets here I’m going to fill it with my very favourite Noodlers Lexington Grey. (Waterproof grey. Beautiful. Doesn’t look like a watered down black. Yes, there is a difference.) Now, I hear someone muttering that Noodlers ink isn’t expensive. Well, it is in Australia and far too much of mine has ended up dried up, soaked off and washed down the drain, along with so much of so many others. Not happy.

#inktober2016

I know it’s February 2017, but I insist that I’m not late with #inktober2016, I’m simply still going!

The Moleskine sketchbook I bought for it arrived late. No matter, I thought, I’ll soon catch up. Then I lost a couple more days testing inks and means of application on the unfamiliar paper. Too many days to do it justice, I thought, I gave up and put it aside. Rolling forward a few weeks I forgot all about it.

Then, after following James Gurney for years, admiring his facility with brush and pen, the thought occurred from nowhere that his study of calligraphy and signwriting were significant influences on his painting. That, I thought, is how one can include some, or all, or reference to, the sign in the sketch with a clunky brush – not just practice but a particular kind of practice.

I began. With pen and brush and ink. Lots of ink.

I’m still going.

And yes, the impact of just a couple of hands (Foundational and brush Italic) and only four months practice has had a significant impact on my sketching too.

Staedtler Lumograph black

lumograph_black_840

Staedtler have made a new version of their trusty Lumograph pencils, that are as good as the old ones, but solve an enormous problem. The very thing that makes graphite beautiful – that silvery lustre – loses it’s subtlety when photographed. Great in a gallery, not great online. These days, when one is far more likely to share one’s work via social media, than a social occasion – that’s a problem.

I use graphite a lot, but end up with little to show on Instagram because I am not going to share something that looks nothing like the work in front of me.

In the photo above – comparing four grades of the Black pencils against the same in the original Lumographs – it’s easy to see the dulling in the middle tones of the graphite – the 4b and 6b look pretty much the same. In the real they’re as close to matching as I could make them, in a reasonable amount of time on ordinary cartridge paper.  Now, I am certain that special paper and a pro photographer with fancy lights could make it come out looking right, but who has that on hand for capturing a sketch to put on Twitter?

lumograph_black_scale

And with just four grades – 2B thru 8B – one can do a passable rendition of a 10 step Munsell scale and photograph that too. I’m impressed.

lumograph_black_points
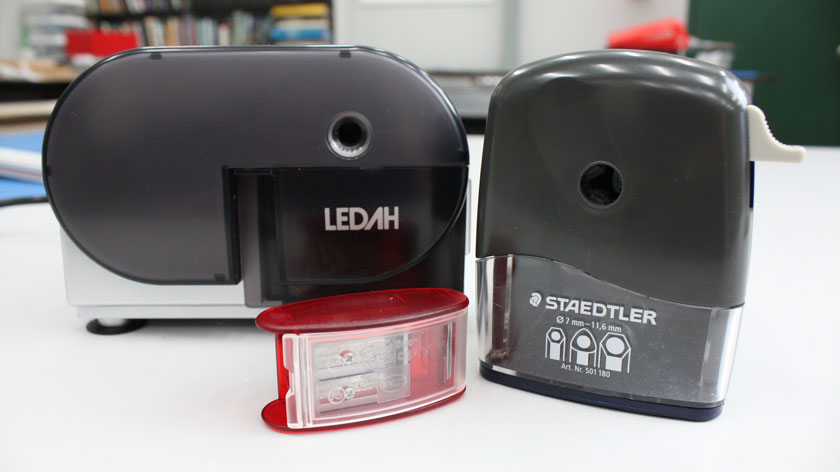
I can hear someone our there muttering that the same value range with a matte finish can be had with charcoal. True, but it isn’t going to offer up a super long point via an electric sharpener (or helical crank or a KUM long point) and be tough enough to scribble and shade with abandon. I think we’re talking graphite tough with charcoal benefits.

History of drapery in painting

Anne Hollander’s book Fabric of Vision: Dress and Drapery in Painting has been reprinted and is available to order from Book Depository or Amazon and, no doubt, many other places.

hollander_fabricI have been so keen to read this book, but second-hand  copies of the original 2002 edition haven’t been affordable and I didn’t want to make an expensive mistake. There are no copies in the West Australian state library system, but Trove revealed there are actually two copies here, both in university libraries. I don’t have borrowing rights for either. (Trove is a wonderful resource but it does generate great envy – the other states between them have 22 copies, including many available to the public.)  In desperation, I called on a friend who happens to have the correct library card…

After reading it cover to cover, I will never draw or paint my scraps of fabric in ignorance again. The wealth of history in drapery through the ages, the significance, the styles and layers of meaning are complex, enthralling and eye-opening. It is one of those books from which note-taking is useless because there would be so many I would need to re-type the whole thing. It’s value is as a reference so all those half-remembered passages may be re-examined with more care when needed. Or dipped into for inspiration by flipping through to look at the pictures or, rather, the pictures she has chosen to juxtapose.

Even though it was written by a respected scholar in conjunction with an exhibition it is actually an engaging, easy read, with a story to tell. Yes, I was concerned that it would be dense or worse, one of those catalogues with tiny illustrations and a difficult essay that doesn’t say much at all! My quest was rewarded and, in my experience, If you too are into making art of drapery and want to know about those whose footsteps we follow: this book belongs on your shelf.

I certainly got what I needed from the library book – the sure knowledge that I will order a copy of my own.  I am very grateful for the loan.

Long point sharpeners

Long point sharpeners

I love to work with graphite and chew through a lot of pencils in doing so. Seriously, I buy them by the box… I am also very fussy about the point,  they have to be long and sharp, but I don’t want to waste time with knife and sandpaper because I would rather be drawing. Achieving that holy grail of getting reliable, fast and long has seen a great many frustrations and waste along the way.

The current line up includes three solutions for my three situations.

Long point pencils

The KUM Long Point sharpener is cheap and portable. Not the cheapest pencil sharpener if compared with those on offer at the supermarket, but the cheapest way to get a long point. It lives in my sketch kit for touchups on the go. I usually carry four pencils pre-sharpened, protected with some sort of cover (currently the Faber Castell 2001 eraser caps because they are pretty much the only thing available here). With the KUM along to keep them going, I can draw for hours.

My studio sharpener was, for many years, one of the old Staedtler Mars Rotary 501-20s. I wore it out. Giving up on it and throwing it away was difficult, made even more so, when I realised that I wasn’t going to be getting another from the stationery store. The new model is OK, but does not deliver quite as sharp a point my old one did. It is still the studio workhorse. Maybe I’m doing something wrong? I love that the plastic claws don’t scratch up the pencil body as many crank sharpeners do.

The past few months have seen me confined to a small room in the house (because my studio is unheated, my version of asthma is triggered by cold air and I’ve been ill). Undeterred, I got help to make room for an easel, improved the lighting as much as I could and figured what media is compatible with a small space and a dodgy set of breathing anatomy. Graphite, of course. Unfortunately there is no right-hand desk edge to which to clamp the Staedtler so thoughts of, maybe, buying a second one evaporated. That’s how the electric Ledah arrived in my life. Look at that point!

Munsell tutorials on video

Paul Foxton, from Learning to See, has released two video tutorials over the past month. Each one features a beautiful little flower painting, is hands-on practical, self-contained and easy to follow. Which would I recommend? Both!

They are available at Gumroad for “pay what you want”. I will add that the suggested $10+ is a bargain. Be generous.

Time’s Unfolding: A Flower Painting Demonstration

Time’s Unfolding, the first of the two tutorials demonstrates a flower painting from setup to finish, covering everything from sight-size, grid-assisted drawing to value control and the thoughts behind the motif. What I like about the way Paul teaches is his way of breaking down complex ideas into practical steps that can be applied to any subject. (He’s a master at skipping the mumbo-jumbo. A rare skill.)

The point he really nails in this one is that it’s about slowing down and taking the time to look (with the aid of a few simple, home-made tools to help figure out what you’re looking at).

Secret Treasure: A Munsell Painting Demonstration

Paul Foxton's video "Secret Treasure"

The second video, Secret Treasure: A Munsell Painting Demonstration, builds on the first, and as the title says, is much more about what Munsell is and how it can be used to assist in making a painting. It begins with a practical guide to describing and analysing colour, before using Munsell as a tool to mix and match the colours needed to make a particular painting.

The delicate transitions in his little flower motif are exquisite, but the point he makes is that matching them it isn’t rocket-science, it’s about taking care in comparing one patch of colour to the next. Munsell is used to describe the differences between each mix very clearly in terms of hue, value and chroma. Again, no mumbo-jumbo, it’s about learning to see the variations and use them.

I’ve been using and writing about Munsell studies since 2007 (my ‘colour theory’ category should find most of them), but Paul’s video is a much easier way to learn!

Problem paintings

Everyone at some time has work that isn’t working. What matters, is figuring out what to do about it and when. I have a set of panels which are part of a new, experimental, body of work that has been hanging around like the proverbial bad smell. I made sketches and colour studies and went back the drawing boards – digital and paper based – several times.

I have been so determined to make a breakthrough I haven’t been able to think about anything else, yet was still making little progress. Then the procrastination set in. I didn’t even want to go to the studio…

This morning, I decided that what I needed was somewhere to put them –  out of of the way but not out of mind – so I can free up my easel for something rather more fulfilling. It’s not the end of the matter, but they can just sit there while I think about what to do with them.

Painting dark drapery

Painting drapery - dark blue with silver highlights
Dark matter, oil on panel, 40x30cm

A new problem – another scrap of fabric  – this time drapery of the darkest blue (almost black) but looking closely I find it’s shot through with a silvery grey.

The solution for painting dark drapery is the same as any other complex image. It is about breaking it down both the drawing and the tones into their simplest elements and then building on them.

For example:

  • lightly sketch the largest forms
  • paint in the darkest areas first to avoid muddying them with any other colour which may have white in it’s mix
  • paint in the midtones
  • save the lights for last and use them sparingly (particularly avoiding the background because this will help make it stay back where it belongs)

I chose to paint the whole picture as a dark blue fabric and then add the  silvery grey as a second layer, scumbled over the dark blue once that was dry. I mixed two versions of the silver, reserving the lightest for the highlights and a slightly darker for everything else. I was keen to avoid attracting to much attention to less important areas but still get the effect of a multi-toned fabric.

Painting white on white

Painting white drapery, a white ceramic rabbit on white satin
White rabbit on white satin, acrylic on canvas, 30x21cm

The Easter bunny is running late here. This little experiment with in acrylics was begun at Easter and intended to be finished over the four day break. It wasn’t that simple.

Painting white on white and having it not look grey is all about carefully managing the tones. There needs to be just enough dark (in this case the sliver of shadow under the ceramic rabbit) to make the rest of the painting look light. Otherwise it may look like an over-exposed photograph. If everything is light, nothing looks light. The shadow, however, cannot be took dark either. There is a lot of reflected light in this scene which will bounces the light into even the deepest crevice.

I began by painting in the shadow with a value 5 which meant that everything else would be lighter. The next darkest dark was everything which faces away from the light – technically still a shadow. I went two steps lighter to value 7, making it as clear as possible that it is a shadow but still reading as white rather than grey.

The trick then was to get that separation of light from shadow with the recommended couple of steps when I am just about of them. By that rule I only had values 9 and 10 left. (White and almost white isn’t much to work with…) In this case where all the objects are white, but I wanted the satin to appear shiny, the white was reserved for just that and a couple of tiny highlights on the rabbit. That meant the rest of the painting had to fall around value nine. Clearly not enough, I cheated a little, and went down to value 8 on a second layer of paint when it all read as far too light.

Quite simply a balancing act of white on white painted and re-painted until it looked right.


Painting grey drapery III

Painting of grey drapery
Big grey, oil on panel, 45x60cm

It might look the same as the last two on the small screen, but this one is different: it’s twice size and twice as complex which meant it was twice as easy to get lost! (Also twice as easy to get frustrated or bored, give up and go do something else.)

Painting drapery is about carefully managing the values and not getting lost with the drawing. If necessary use a grid! You can make one with cardboard and string then suspend it in front of the subject with whatever artistic ingenuity is required to get the job done. You will quickly find that it’s necessary to keep your head in the same position as you draw. (Don’t worry, it does get easier with practice.)

Don’t draw too much, drapery might look complex but it does follow thae same pattern as any other painting. Indicate the largest shapes – like the main roads on a map – which should then be enough to figure out where the streets are when you get to them. If you draw too much detail it is tempting to try to paint inside the lines rather than paint the big shapes and add the smaller ones over the top. (That’s pretty much the difference between painting  and ‘painting by numbers’.)

Rough in the darkest dark first because this will set a marker for the value range. Decide how light the lighest lights can go and the rest has to fit in between. With the range set it’s a matter of deciding on the dividing line between light and shade. The rest is puzzle pieces – fit them together and then add a few details to finish.